| ||||||||||||||||||||||||||||||||||||||||||||||||||||||||||||||||||||||||||||||||||||||||||||||||||||||||||||||
|
THE PRINTMAKER
The printmaker is a most peculiar being. He delights in deferred gratification and in doing what does not come naturally. He prefers the difficult and arduous approach to expression. He takes pleasure in working backward or in opposites: The gesture that produces a line of force moving to the right prints to the left and vice versa; a deeply engraved trench in a copper plate prints on paper as a raised line, while a raised line on a plate prints as a depression in the paper. Left is right. Right is left. Backward is forward. The printmaker, peculiar as he is, must see at least two sides to every question. From Jules Heller, Printmaking Today, 1972. ORIGINAL FINE ART PRINTS What is an original fine art print? An original fine art print is handmade. The artist is involved directly in the entire process: making the plate, inking, and printing on a press that runs one print at a time. When the artist makes several prints from the same plate, the series is called an edition. In a fine art edition, each print is numbered with two numbers, showing where the print is printed in the sequence, and how many prints exist. For example, if you see the number 12/35 on an original print, the print was made as the 12 th in an edition of 35 and there are only 35 of that particular print existing. On a fine art print, you will usually see the title, the edition number, and artist's signature in pencil. What is a reproduction? A reproduction is a copy of a print, such as a photo offset, photocopy or laser copy. It is not made from an original plate, but is copied, mechanically, from a finished original work done in a different medium, such as oil, watercolor or pastel. Reproductions can vary widely in quality. When the original work is itself rare, antique, valuable, or expensive, the reproductions may be fairly expensive themselves. Occasionally artists will add hand-done touches, such as brushstrokes, to a reproduction of their work. What is a giclee print? A giclee print is a reproduction created by digitally scanning the art and printing the image with an inkjet process. It permits reproduction with extreme detail, and artists sometimes add further touches by hand. However, it is not considered an original print. The giclee process does permit buying a less expensive and well reproduced version of what might otherwise be a very expensive work. PRINTMAKING TECHNIQUES Printmaking techniques are commonly divided into four basic types:
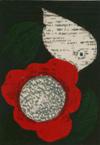
A note on black-and-white and color: Any of these processes can produce a simple black and white image; the artist simply uses black ink, and the white (or other paper color) shows through the unprinted portion of the image. Producing a color image is more complex. The artist can create a separate plate or block for each color and then print the plates in layers. Or, the image can be hand-colored after it is printed. When processes like etching and engraving were used to produce large editions or book illustrations, colorists, many of them women, were hired to hand-color each image. RELIEF PRINTS: PRINTING THE REMAINING SURFACE In linocut, woodcut, and wood engraving, the artist cuts away unwanted areas of the block, using carving tools designed for this work. Ink is spread on the surface of the block. The artist can print color prints either by putting different color inks on the same block, or by creating a separate block for each color and then printing them in layers. Prints made with a single block have a limited range of tonal value; many are simply black and white. With multiple blocks, the artist can create tonal value by layering color. The paper, often thin Japanese paper, is usually used dry. Relief prints leave no plate mark on the paper. Linocut: The printed image usually has smooth saturated inked areas. No press is needed; the artist can use a baren (a rounded rubbing tool) or even a household spoon to press the paper onto the block. Senadin, below, inks both the grooves and the surface of the plate for another effect.
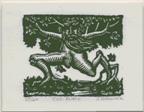
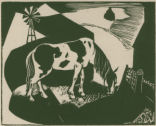
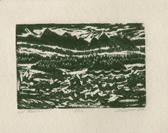
Woodcut: The artist uses a chisel, knife, or gouge to carve the block on the plank grain of the wood. The grain of the wood is sometimes visible on the finished print. A different block is carved for each color. The artist can use a press or can print the block by hand.
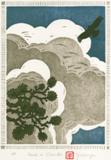
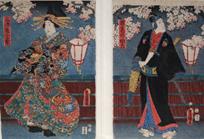
Reduction print (linocut or woodcut): The artist cuts away part of the block, then inks and prints the remaining surface. This process is repeated through several printings. In the process, the block is completely destroyed; no further images can be printed beyond the first set. Because this process is difficult and complex, the edition is usually small. Japanese woodblock: The artist carves on the plank grain of the wood with knives, carving a different block for each color. Sometimes hundreds of blocks are carved. The artist then prints each color over the other, with perfect registration (alignment), by hand rubbing. Translucent inks increase the tonal value of the image.
Wood engraving: Wood engraving began in the late 1700's. In wood engraving, the artist carves on the end grain of a hardwood block, such as boxwood or cherry, instead of using the plank grain. The hard wood end grain produces a stronger block that can print hundreds of images. For this reason, wood engravings became popular for illustration in books and periodicals in the 18th and 19th centuries.
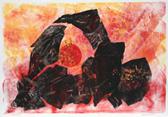
Collograph: This is a relatively new form of relief print. The artist starts with a stiff surface, such as masonite or mat board, and builds a textured surface using various objects or materials. The plate is then coated with a medium like varathane or acrylic glaze that hardens the textured surface. Collographs are usually printed with a press on damp paper. The images show high relief and embossing on the paper.
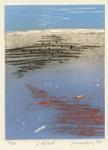
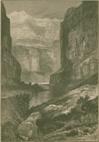
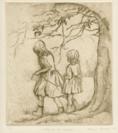
INTAGLIO PRINTS: PRINTING THE INCISED LINE In etching and aquatint, the artist uses an acid bath to cut into the metal plate. In engraving and mezzotint, the artist cuts the lines into the plate using various engraving tools. Intaglio prints are usually printed on damp paper. The press used for intaglio printing has pressure similar to that of an old hand-wringer washing machine. A plate mark is visible on the print. With intaglio prints, the artist can produce a wide range of tonal values from white through a variety of grays to black, as well as a rich range of color values. Etching: The artist covers a plate with a ground, then uses a burin or needle to scrape away the ground for the lines of the images. The lines are the same width throughout the print. The acid bath cuts only the exposed lines. The artist then cleans off the ground, inks the plate by forcing ink into the cut lines, and prints.
Softground etching: The artist prepares the plate with a ground, and then uses a pencil to scrape away the ground and create the image. The result is an etching with softer, varied, and broken lines, looking somewhat like a crayon line.
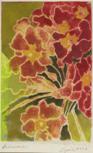
Aquatint: Aquatint produces an image that is soft and richly colored, often similar to a watercolor image hence the name aqua(water)tint. The image is printed on damp paper, and the plate leaves a plate mark on the paper. Etching an aquatint plate is a complex process. The artist begins by dusting the plate with rosin to create texture, then uses heat to bond the rosin to the plate. To create the image, the artist first identifies the white areas of the finished print. Then, using an exceptionally fine watercolor brush, the artist carefully covers those areas with asphaltum, to protect them from the acid bath. The exposed areas of the plate will gradually be etched to create a surface to hold ink. The more exposure to acid, the deeper the etch, which creates the darker areas in the final print. After a short acid bath, the plate is washed and is ready for the next paint-out. The artist identifies the areas that will keep the first light etch, producing a light gray tone, and paints out those areas. This process is repeated many times until all the values from white to black are achieved. Then the protective asphaltum is removed and the plate is printed. This means that there are no lines in aquatint, and that the artist must paint around branches of trees and other delicate forms to continue their exposure until the desired darkness is achieved. For a color aquatint, the artist creates a separate plate for each color, and then prints them in layers.
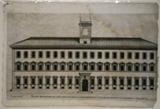
Engraving: No acid is used in engraving; the artist creates the images by drawing into the plate with a burin or gravure to create an incised line. The line varies in width and depth, and is pointed at the start and finish. The artist can use cross-hatching and parallel lines for shading, and can produce extremely fine details and sparkling white spaces. Engraving was frequently used in book illustration, and images were ofter carefully hand-colored with watercolor.
Drypoint: For drypoint engraving, the artist uses a fine point burin which creates a burr of metal along the cut lines. The result is an image with lines that appear rich and somewhat fuzzy.
Mezzotint: In mezzotint, the artist uses a tool called a rocker to create minute burrs covering the entire plate. At that point, the plate would print completely black, from ink in all the burrs. To create various lighter tones, the artist uses a tool called a scraper to remove the burr, or a burnisher to flatten the burr. The more the artist removes the burrs the less ink they hold. This creates a range of shades from black to white in the printing process. This range of tone is what gives mezzotint its name. Mezzo means middle, and the process creates a wide range of mid-tones. It produces images that are deep and velvety. A color print requires a separate plate for each color, and careful registration and layering in the printing process.
Stipple engraving: For stipple engraving, the artist uses a tool called graver to engrave hundreds of tiny dots into the plate. The result is an image made of tiny dots instead of lines. Stipple engraving produces an image with extremely fine detail.
PLANOGRAPHIC PRINTS (PRINTING FROM THE FLAT PLATE) Because the planographic print requires no carving or cutting into the plate in any way, artists can produce a wide variety of images that have surfaces similar to drawings and paintings. Lithography, monotype, and monoprint are all planographic prints. Lithography: A lithograph print is based on the idea that oil repels water. The preferred surface is rare Bavarian limestone, though some artists use zinc or aluminum plates. The artists draws the image with a greasy medium such as a lithograph pencil, or tusche. Then the artist wets the whole plate or stone. The water will not stick to the drawn greasy image, but will wet the rest of the plate. When the artist inks the plate, the ink will stick to the drawn image, and not to the rest of the plate. The artist then prints the image, either by hand rubbing or with a lithography press. The resulting image has the fine quality of a drawing. The tonal value is unlimited. The grain of the limestone may show on the printed image.
Chromolithography: Chromolithography, a method for making color lithographs, developed in the mid-19th century. A chromolithograph requires a separate stone or plate for each color, and great skill is needed to register (to align) the plates perfectly. Highly skilled chromolithographers sometimes used dozens of plates, producing rich, complex surfaces. In this detailed form, the process was used primarily from the 1860s to the 1920s.
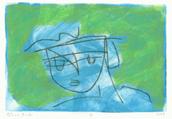
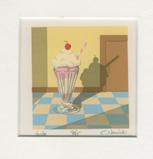
Monotype: In monotype (and monoprint), only one unique impression is made from a plate. The artist may use the plate to print similar images, but none will be identical. There are no editions in monotype, although some artists produce a series of prints with a unifying theme. The artist paints on a plate, and then prints the image, either by hand or with an etching press. After the first printing, the artist often paints added layers or design elements on the plate, and prints added layers. Monotypes have a painterly appearance. The technique allows the artist to produce a wide variety of images.
Monoprint: To make a monoprint, the artist starts with either a printed monotype or with a clear plate, and then uses various mediums and methods to change or create the image. For example, the artist may add texture by printing with a textured surface of some kind. Or, the artist may start with another print, such as an engraving, and make it unique by adding a monotype layer over it or under it.
STENCIL PRINTS (PRINTING THROUGH A CUT FORM) Serigraph (screen printing): For a serigraph, the artist draws the image on a specially designed fine screen, then blocks out the rest of the screen. The artist applies ink over the whole screen, and then forces the ink through the screen onto the paper below, using a squeegee. Where the screen is blocked, the ink will not come through onto the paper. Serigraphs produce colorful prints with a silky image and broad areas of color with the same value. The texture of the screen sometimes shows on the print. The print can look like brushwork, pen, or crayon.
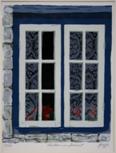
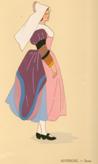
Pochoir (cut stencils): While this is similar to the familiar process many of us have used to make signs or other images, the pochoir technique produces complex images with many layers of color and texture. The artist must first carefully analyze the elements and colors of the composition, then cut a stencil for each segment. Up to 80 plates are sometimes used. Copper, zinc, and aluminum were originally used for the stencils; contemporary artists now often use celluloid or plastic. When large editions were produced in the 18th through early 20th centuries, the stencils would be passed to colorists, who used special brushes or pads to carefully color through the stencils to create the finished prints. Finished pochoir prints have deep, brilliant, and strong color. The thick but clean edge of the paint often leaves an edge that can be felt on the print.
CHRONOLOGICAL HISTORY OF PRINTMAKING TECHNIQUES:
|
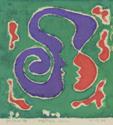
 Relief: prints what is left of the original surface
  Intaglio: prints what is below the plate surface
  Planographic: prints what is drawn on the surface
  Stencil: prints open areas of the stencil.